[OLD] 📱What is SmartValidate?
Introduction
When it comes to leveraging artificial intelligence (AI) for tasks like receipt validation, one critical aspect is the use of well-structured prompts for the AI to interpret and the subsequent validation of the extracted information. These processes, known as prompt design and validation, are fundamental to ensure accurate and effective data extraction, which is essential in situations like validating purchases against promotional campaign terms or company expense policies. Let's dive into these two aspects in more detail:
Prompts
In the context of receipt validation, prompt design involves carefully crafting and formatting the raw text data extracted from the receipts into meaningful prompts that an AI model can interpret effectively. This often involves isolating key pieces of information such as the purchase date, vendor name, item descriptions, and total amounts.
In addition, context might also be added to these prompts to help the AI understand the nature of the information it needs to extract. For example, the prompt might indicate that the AI needs to identify whether the retail is part of the campaign. The quality of these prompts can significantly influence the accuracy of the information extracted from the receipts.
Validation
After the prompt design and extraction of key information from the receipts, the validation process begins. In this stage, the AI system will cross-reference the extracted information against predefined criteria.
For example, if the campaign terms specify that purchases must be made within a certain period, the AI will check the purchase date it extracted against this period. If the terms require specific products to be bought, the AI will validate the item descriptions against a list of eligible products. This process ensures that only valid receipts are accepted, helping to maintain the integrity of the campaign.
How to use Smart Validation
Tutorial - 1️⃣ Setup your first campaign
- Head over to Create campaign settings
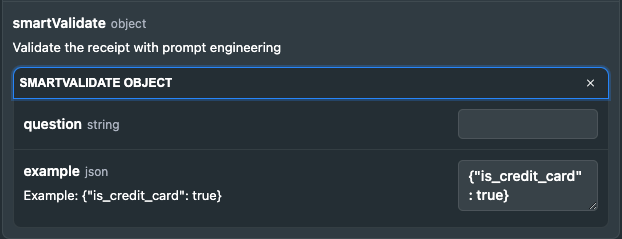
- Create campaign settings with a new campaign id or campaign name and put the question/prompt in the body with an example of the expected
- Hit Try It!. New campaign settings will be created
- Then, go to Validate receipts
- Upload a receipt and put the campaign id or campaign name in the body
- Hit Try It!!
- Voila! We get the result back!
-
{
  "successful": false,
  "failedValidations": [
    "merchant_name_validated",
    "product_line_items_validated",
    "is_credit_card"
  ],
  "passedValidations": [
    "date_validated",
    "is_credit_card"
  ],
  "productLineItems": [
    ...
  ],
  "matchedProductLineItems": [],
  "date": "2023-04-01T12:00:00Z",
  "merchantName": "Test Merchant Name",
  "smartValidate": {
    "is_credit_card": false,
    "tim_tam_flavours": [
      "Original",
      "Double Coat"
    ]
  }
}
-
Updated 7 months ago