Setting Up Purchase Validation Campaigns
Taggun's Receipt Validation APIs empower you to easily run promotions by automatically validating purchases with receipts or invoices.
This guide walks you through setting up and managing a campaign, offering a streamlined solution for automating promotions, rewards, and warranty programs.
Start with the fundamentalsIf you haven't aleady, start by checking out our guide on Receipt Validation Fundamentals.
Step-by-Step Guide
Step 1: Get Access
To start, you'll need to have a Taggun API key. Get your free API key here.
You also need to unlock this feature by contacting [email protected].
Step 2: Set-Up Your Campaign Settings
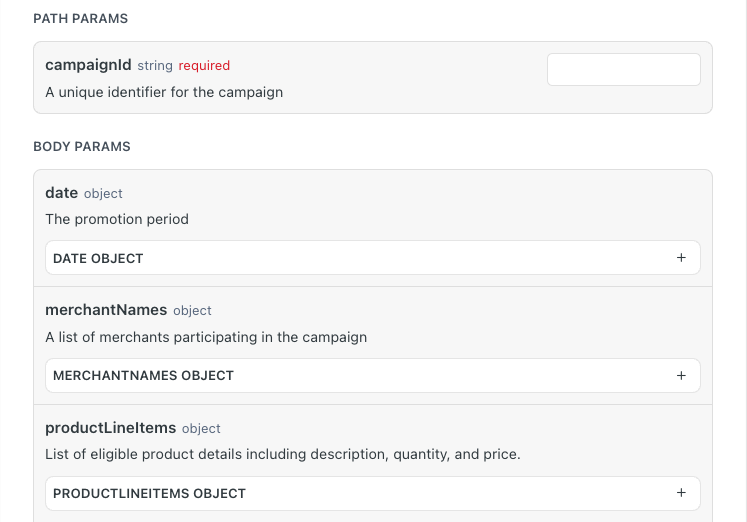
To create a receipt validation campaign, you'll need to define the campaign rules. These include parameters such as the promotional period, participating merchants, and eligible products.
VisitCreate Campaign Settings in our API Reference to set up the following:
Required Parameters
campaignId: A unique identifier for your campaign.
Optional Parameters
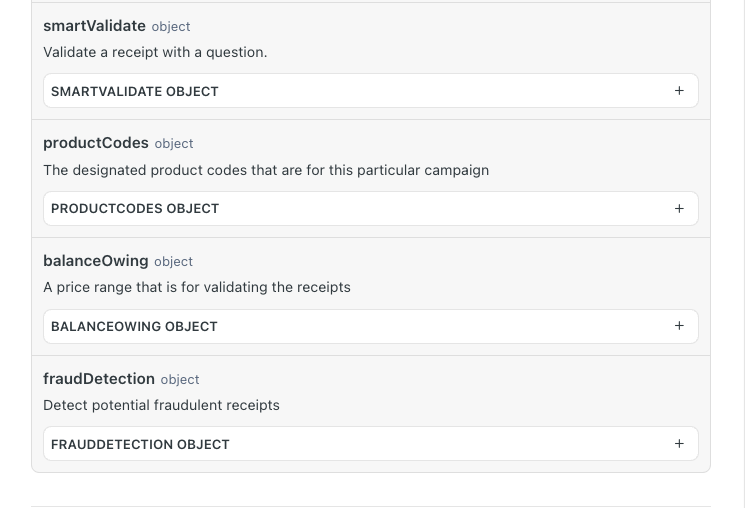
date: Define the valid date range for purchases.merchantNames: List of participating merchants for the campaign.productLineItems: Specify eligible product descriptions, quantities, and prices.fraudDetection: Set parameters to enable receipt fraud detection.productCodes: Include specific product codes relevant to the campaign.balanceOwing: Define a price range to validate the total balance on receipts.smartValidate: Add a validation question for additional verification.skip: Option to skip certain checks, defaulting to false.returnFromTheList: If true, returns a matched merchant name from a predefined list.
Basic Settings

Note: Taggun’s Receipt Validation engine includes built-in merchant and product normalisation.This automatically standardises merchant names and product details across receipts. This ensures more accurate matching, even if merchants or product names appear differently on the receipts.
Special Settings

Step 3: Validate Receipts
Once your campaign settings are configured, validate receipts submitted by customers.
Endpoint
POST https://api.taggun.io/api/validation/v1/campaign/receipt-validation/fileRequired Parameters:
fileThe receipt or invoice file (max 20MB). Accepted formats: PDF, JPG, PNG, GIF, HEIC.campaignIdThe campaign ID with the settings used to validate the receipt.
Optional Parameters
referenceIdA unique reference for tracking and feedback purposes.
Example Request
curl --request POST \
     --url https://api.taggun.io/api/validation/v1/campaign/receipt-validation/file \
     --header 'accept: application/json' \
     --header 'apikey: YOUR_API_KEY' \ #UPDATE to your API Key
     --header 'content-type: multipart/form-data' \
     --form 'file=@/path/to/receipt.jpg' \ #UPDATE for your file path
     --form 'campaignId={campaignId}' \ #UPDATE to your campaignId
Handling Validation Results
Taggun will return a response indicating whether the receipt passed validation:
{
  "successful": false,  // Indicates if the receipt passed validation (true/false)
  "failedValidations": [
    // List of validation checks that failed (e.g., "product_line_items_validated")
  ],
  "passedValidations": [
    // List of validation checks that passed (e.g., "merchant_name_validated")
  ],
  "productLineItems": [
    {
      "name": "",          // Name of the product from the receipt
      "totalPrice": 0.0,   // Total price of the product
      "quantity": 0        // Quantity of the product
    }
  ],
  "matchedProductLineItems": [
    // List of product line items that matched validation criteria (if applicable)
  ],
  "date": "",  // The date of the receipt (in ISO 8601 format, e.g., "2024-05-21T15:31:00.000Z")
  "merchantName": "",  // Name of the merchant from the receipt
  "merchantAddress": "", // Address of the merchant from the receipt
  "merchantCity": "", // City of the merchant from the receipt
  "merchantPostalCode": "", // Post code of the merchant from the receipt
  "merchantState": "", // State of the merchant from the receipt
  "merchantCountryCode": "", // Country code of the merchant from the receipt
  "smartValidate": {
    // Contains results of specific validation questions (true/false values)
  },
  "totalAmount": 0.0,  // The total amount from the receipt
  "receiptNumber": "",  // Receipt number (if available)
  "invoiceNumber": "",  // Invoice number (if available)
  "trackingId": "",  // Unique ID for tracking the validation request
  "targetRotation": 0  // Degree of rotation applied to the receipt image for validation (if applicable)
}
Best Practices
- Use a clear, unique
campaignIdnames - Consider using SmartValidate for more complex and creative validation scenarios
- Test with a diverse range of retailer receipts that reflect the expected campaign entries
- Implement error handling for failed validations
- Provide you have a customer support option in place to handle any inquiries related to purchase validation
Advanced Capabilities
Fraud Detection
Enable fraud detection in your campaign settings to automatically flag suspicious receipts.
Learn more about Taggun's fraud detection here.
Multi-language Support
Learn about Taggun's global capabilities here.
Smart Validation
Learn how to use SmartValidate here.
To enable purchase validation, please contact our team at [email protected].This feature is not enabled by default.
Updated about 1 year ago